


An e-bike crash safety checklist covers the battery, frame, and electrical system — the three systems that create safety-critical risk after impact. A crash-damaged lithium battery can trigger thermal runaway hours later with no external warning; a compromised frame or fork can fail under riding load; and disrupted electronics produce unpredictable motor behavior. Inspecting in sequence — battery first, frame second, electronics last — determines whether the bike needs professional service, targeted repairs, or is safe to ride.
E-Bike Crash Safety Checklist — How to Inspect and Repair Your Ride After a Crash

Table of Contents
- First: Stop, Power Down, and Don’t Ride Yet
- Assess the Battery First — It’s the Highest Risk
- Inspect the Frame — Look for Cracks, Bends, and Buckling
- Check the Fork and Steering — Can You Ride Straight?
- Test the Brakes Before You Touch the Throttle
- Wheels and Tires — Check for Damage You Can Feel and Some You Can’t
- Inspect the Drivetrain — Chain, Derailleur, and Pedals
- The Electrical System — Motor, Controller, Wiring, and Display
- Lights, Sensors, and PAS — Does Everything Still Work?
- The Ride Test — How to Know if the Bike Is Truly Safe
- When to Take It to a Shop Instead of DIYing
- E-Bike Crash Inspection Checklist: A Quick-Reference Summary
- Electric Bike Motor Repair After a Crash — What’s Actually Fixable
- Ebike Battery Inspection After a Crash — The Risks You Can’t See
- Bent Bike Frame and Fork Damage — Repair or Replace?
- Ebike Throttle and Controller Damage — Diagnosing After Impact
- What to Do if Your E-Bike Was Damaged in an Accident Involving a Car
- Frequently Asked Questions
- How This Article Was Created
First: Stop, Power Down, and Don’t Ride Yet
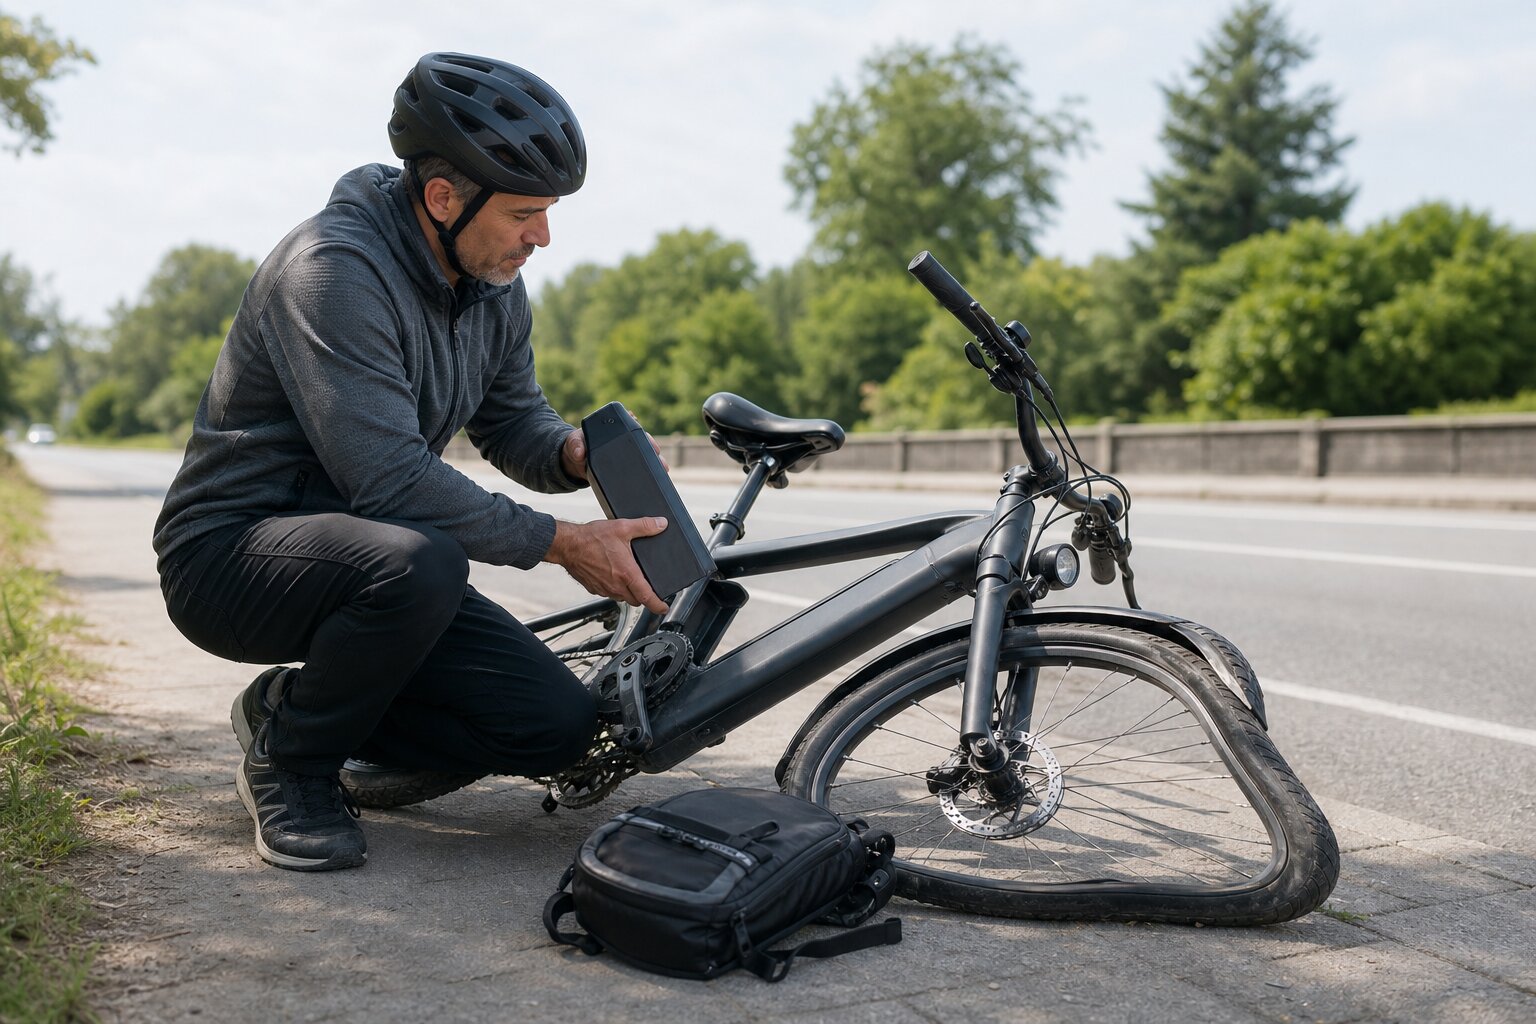
After an e-bike crash, the first thing to do is power the bike completely off and remove the battery — before inspecting anything else.
Your instinct is to get up, check yourself, and ride away. Resist that instinct.
E-bikes carry high-voltage electrical systems that can become dangerous after a crash. A damaged battery can start a fire hours after impact with no warning. A cracked frame can fail under load. A bent fork can make the bike uncontrollable at speed. None of these are obvious at a glance.
Do these four things immediately after a crash:
- Power the bike off using the main power button on the display or controller.
- Remove or disconnect the battery if you can do so without tools. Most downtube and rack batteries have a key or locking latch. Removing it prevents the motor from engaging accidentally through a damaged throttle or sensor, which can cause secondary injuries or electrical shorts.
- Move the bike to a safe, stable surface — off the road, away from traffic, upright against a wall or on its kickstand.
- Wait before inspecting. Adrenaline masks both physical pain and mechanical damage. Give yourself a moment before you start assessing.
Once the bike is stationary, try this quick check: lift the front wheel a few inches and let it drop onto the tire. Listen. A healthy bike lands with a clean thud. Rattling, metallic clinking, or a sense that something shifted inside means a component has come loose — don’t ride until you find it.
Assess the Battery First — It’s the Highest Risk
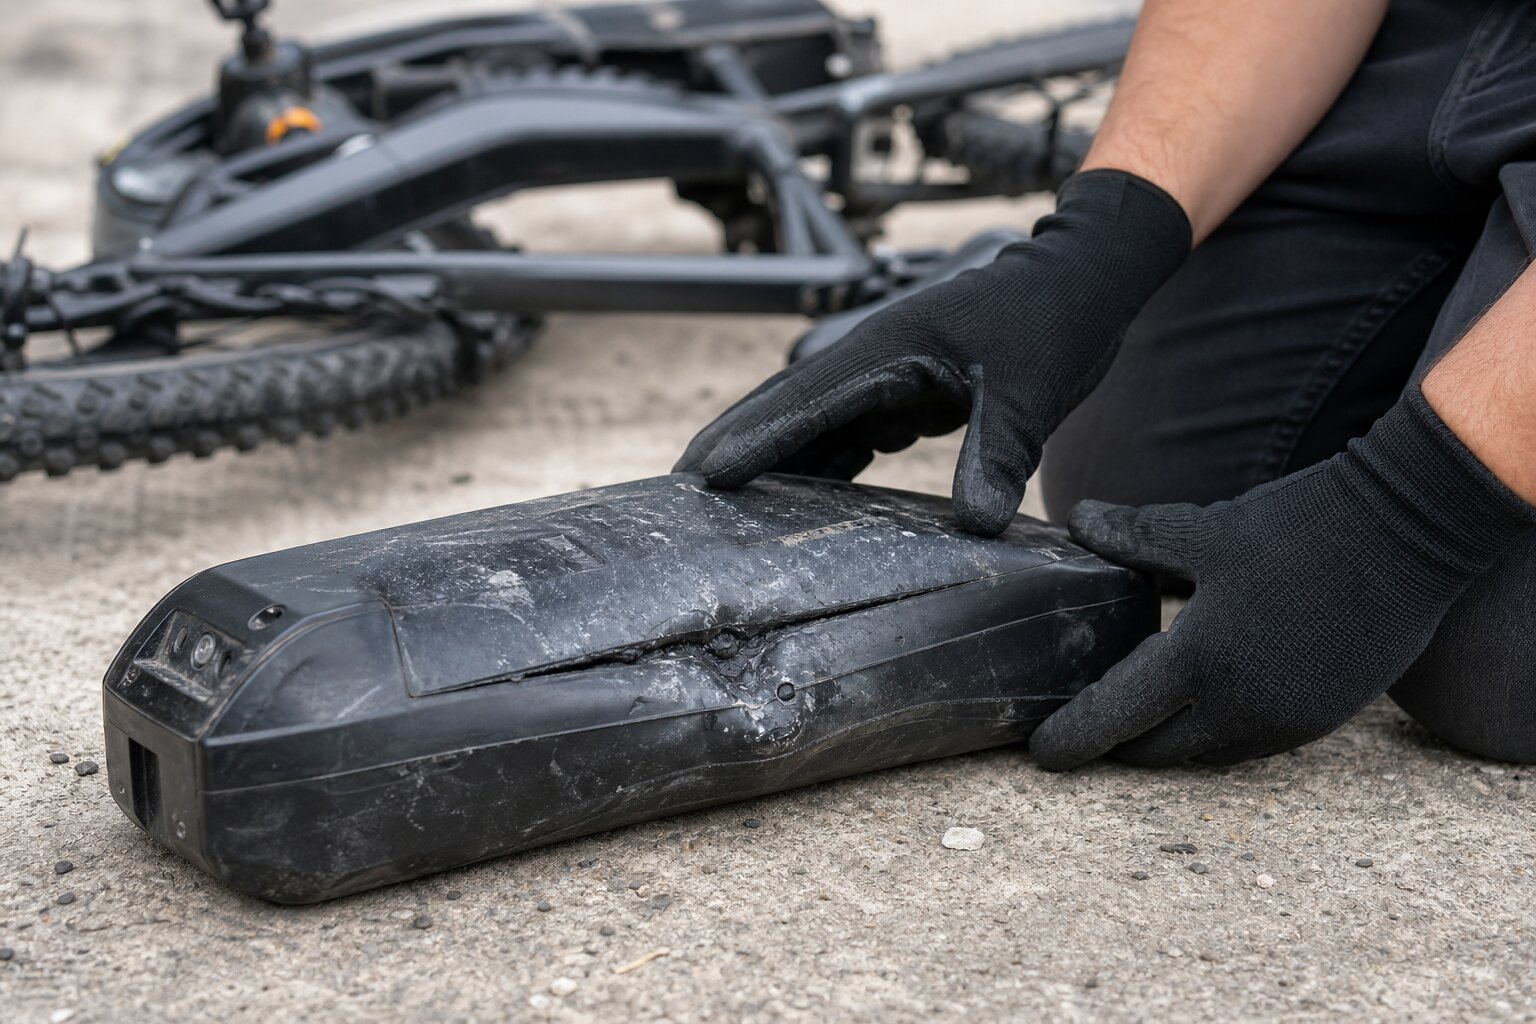
This is the most important inspection step on any e-bike after a crash, and the step that no general bike guide addresses adequately.
E-bike lithium-ion battery packs are dense collections of chemical energy. Inside each cell, a microscopically thin polymer separator keeps the reactive anode and cathode materials apart. A crash can rupture that separator without leaving any visible mark on the outside of the battery. When the separator fails, the cell short-circuits internally. The internal temperature spikes rapidly, triggering a chain reaction called thermal runaway: the liquid electrolyte vaporizes into flammable, toxic gas; the heat transfers to neighboring cells; and the fire cascades through the entire pack.
The critical fact: this chain reaction can begin hours after the crash, not just at the moment of impact. A battery that looks and feels fine right after a collision can still be compromised. One incident documented by the FDNY in Queens showed a battery fire event engulfing an entire residential room in flames in under twenty seconds.
Warning signs this process is already underway include rising temperature, venting gas or vapor, smoke, or a burning chemical smell. A battery that has shown any of these signs — or has been in a significant crash — should not be used or charged until the manufacturer or a qualified technician has assessed it.
How to inspect the battery after a crash:
- Remove the battery from the bike if you haven’t already.
- Examine the housing for cracks, dents, swelling, or deformation. A swollen battery — where the casing has visibly expanded or bulged — means internal gas is building up inside the pack. Treat it as a fire risk immediately.
- Smell the housing. A burning or chemical odor means something is already happening internally.
- With the battery powered off, feel the outside with the back of your hand. Unusual warmth is a red flag.
- Confirm the battery still clicks securely into its mount without rattling.
If any of these warning signs are present:
- Do not charge the battery.
- Do not store it indoors overnight.
- Place it outside on concrete, away from structures, vehicles, and flammable materials. If you have a fireproof lithium battery storage bag, use it.
- Contact the battery manufacturer before doing anything else. Do not guess.
If there are no visible warning signs but the bike shows battery-related error codes on startup, or range drops significantly after the crash, treat the battery as suspect. BMS (Battery Management System) error codes mean the battery’s internal electronics have flagged a problem — do not dismiss them.
When in doubt, ebike battery replacement is the safer choice. A replacement pack is expensive. A lithium battery fire inside your home or garage is catastrophic.
Inspect the Frame — Look for Cracks, Bends, and Buckling
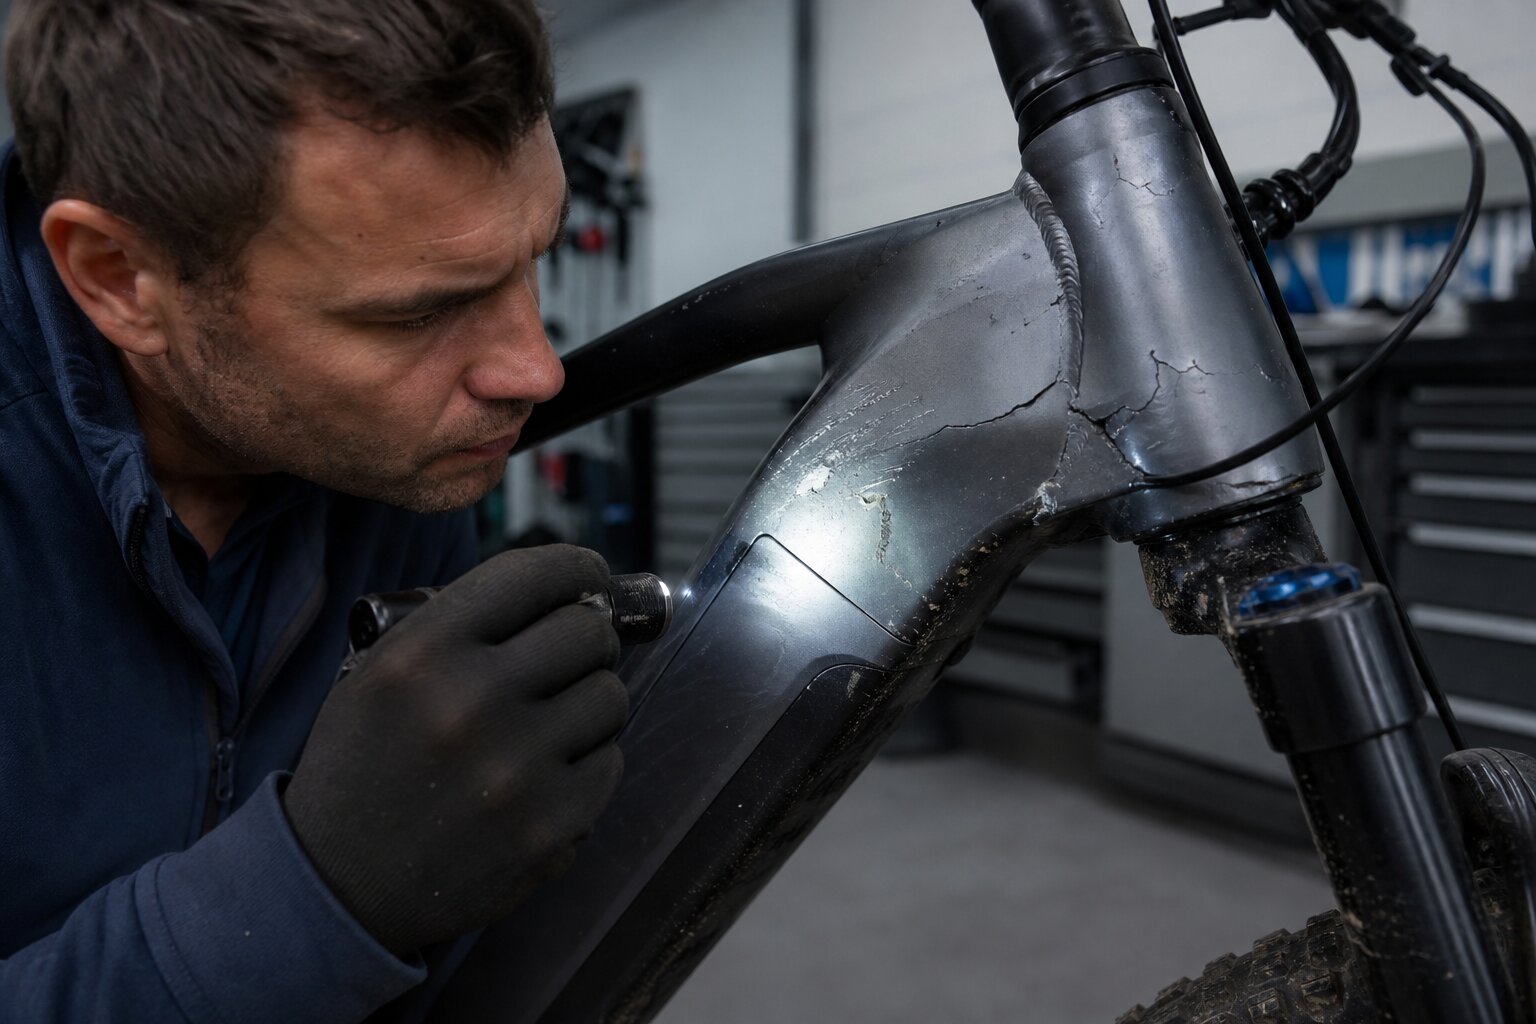
The frame is the structural core of the bike. If it’s compromised, everything else is irrelevant — the bike cannot be ridden safely.
Frame damage looks different depending on the material.
Aluminum frames (the most common material on e-bikes)
Aluminum doesn’t bend gracefully. When it deforms under crash impact, the metal work-hardens at the point of stress and becomes brittle there. Cold-setting it back into shape — bending it by force — only makes the problem worse.
To inspect an aluminum frame:
- Stand the bike level on flat ground. Sight down the top tube from the front — does it look straight? Repeat for the down tube and seat tube.
- Run your hand along all the tubes and feel for ripples or deformation beneath the paint.
- Inspect every weld: head tube junction, bottom bracket, chainstay connections. Look for paint that’s cracking, flaking, or bubbling along the weld bead. This often indicates that the metal underneath has deformed.
- Hairline cracks running parallel to a weld mean the frame is failing at that joint. Do not ride.
Carbon fiber frames
Carbon damage is frequently invisible to the eye. The frame can look perfect externally while being structurally compromised underneath. Carbon fiber relies on layers of woven material bonded in epoxy resin — when those layers separate under impact, a condition called delamination, the tube loses structural rigidity without showing a visible crack.
To check a carbon frame, use the coin-tap test: systematically tap along the frame tubes with the edge of a metal coin. Intact carbon produces a sharp, high-pitched “tink.” A dull, muffled thud indicates delamination — the internal layers have separated.
Also run a soft cotton cloth along the frame surface. If the fabric snags, splintered carbon fibers have broken through the clear coat — the tube is damaged and needs professional evaluation before riding.
Steel frames
Steel is more forgiving. Sight down each tube from front and rear, feel for ripples, and check paint integrity at stress points. Unlike aluminum, steel can deform without becoming immediately brittle — but a visible bend is still a structural concern that requires assessment.
Any frame damage that isn’t clearly cosmetic requires shop evaluation before the bike goes back on the road.
Check the Fork and Steering — Can You Ride Straight?
A bent fork is dangerous in a specific way: it makes the bike track crooked. At e-bike speeds — which can reach 20–28 mph — a bike that won’t track straight is a crash waiting to happen.
How to check the fork and steering:
- Stand the bike on level ground. Look straight down from above the stem toward the front wheel. The wheel should be centered in the fork legs, aligned directly with the rear wheel. If the wheel sits off to one side, or the fork legs look asymmetrical, the fork is bent.
- Apply the front brake firmly and rock the bike forward and backward. Any clunking or notchy feeling in the headset means the bearings are damaged or the steerer tube has been compromised. A bent or cracked steerer tube can snap unpredictably under braking or cornering loads, causing serious injury — this is a shop-immediately situation.
- To check stem bolt torque: stand over the top tube, straddle the front wheel between your knees, and try to twist the handlebars independently of the wheel. Any rotational movement means the stem clamp has lost torque and needs to be reset.
- Inspect the stem clamp area for cracks. Check both stem bolts for security.
- If the bike has a suspension fork, look for oil seeping around the stanchion seals. Oil at the seals means the internal cartridge has been damaged under compressive impact — the fork needs service before the bike is ridden.
If steering alignment can’t be restored by loosening and re-centering the bars — or if the headset clunks, the fork looks visibly bent, or the bike won’t track straight — this is not a DIY fix. Take the bike to a shop.
Test the Brakes Before You Touch the Throttle
E-bikes are heavier and faster than a regular bike. The extra weight increases stopping distance, and the extra speed reduces reaction time. The braking system is the primary e bike safety mechanism after a crash, and it needs to be confirmed before anything else is powered on.
Brake inspection sequence:
Levers
- Look at both brake levers. Are they bent, cracked, or broken? A bent lever may still have mechanical function but may contact the handlebar grip before fully engaging the brake.
Hydraulic lines (hydraulic disc brakes)
- Trace both hydraulic hoses from lever to caliper. Look for any fluid — a greasy, oily residue near the hose, banjo bolt, or caliper means fluid has escaped. Hydraulic fluid loss compromises the entire system.
- Squeeze each lever. It should feel firm and progressive, stopping well before the grip. A lever that pulls all the way to the grip with soft, spongy, or non-linear resistance means air has entered the line or fluid has been lost. Do not ride on spongy hydraulic brakes.
Cables (mechanical disc or rim brakes)
- Check the cable from lever to caliper for kinks, frays, or housing that’s been crushed or cut.
- Squeeze each lever and feel for smooth, progressive engagement.
Rotors and brake pads
- Elevate the wheel and spin it slowly. Watch the rotor pass through the caliper. A rotor that wobbles side to side, or that produces a scraping sound against the pads, is warped and needs truing or replacement.
- While the wheel is elevated, visually check the brake pads. Worn pads — less than 1mm of friction material remaining — have reduced stopping power even before the crash. If they were borderline before, replace them now.
Brake cut-off sensors
- These sensors, built into the brake lever mechanism, signal the motor controller to cut power when braking. A crash can physically jam the lever pivot or dislodge the tiny sensor magnet, leaving the controller in a permanent “brakes applied” state. The result: the motor won’t engage at all, even though the display shows full battery power. Squeeze each lever fully and confirm it returns cleanly to the rest position. If the motor is completely unresponsive after all other checks, the brake cut-off sensor is the first thing to test.
If brakes feel compromised in any way, address that before proceeding to a ride test.
Wheels and Tires — Check for Damage You Can Feel and Some You Can’t
Wheel and tire damage after a crash is common and sometimes non-obvious — a rim can look straight while having lost spoke tension, and a tire can look intact while the sidewall casing has failed internally.
Wheel inspection:
- Elevate each wheel and spin it slowly. Watch the rim pass through the brake caliper or a fixed reference point. A rim that wobbles side to side is out of true. Minor wobble may be manageable temporarily; any wobble that causes rotor contact or brake rub is not rideable.
- Run your fingers along the rim surface. Feel for dents, flat spots, or cracks, especially at the spoke nipple holes where the rim is most vulnerable to impact stress.
- Pluck individual spokes like guitar strings. A wheel with proper tension has spokes that all produce similar tones. Spokes that sound dull or feel loose have lost tension — they’ll cause increasing wobble and can back out completely, puncturing the inner tube.
- Confirm axle nuts and quick-release skewers are properly torqued. Impact vibration can loosen these, creating the risk of a wheel ejecting from the frame during riding.
Tire inspection:
- Run your hands slowly around the full circumference of each tire sidewall. Look and feel for cuts, tears, or bulges. A sidewall bulge means the internal tire carcass has failed at that point — the tire can blow out suddenly under the torque load of an e-bike motor. Replace immediately. Do not ride on a bulging tire.
- Check tire pressure. A significant drop from normal suggests a slow leak or rim damage.
- Inspect the tread for embedded debris — glass, wire, and road fragments can cause delayed flats.
A note on spoke tension after high-speed crashes: A wheel that looks straight and passes a spin test can still have uneven internal stress from impact. After any significant crash, it’s worth having a shop check spoke tension — particularly on a heavier e-bike where wheel loads are higher than on a conventional bike.
Inspect the Drivetrain — Chain, Derailleur, and Pedals
Drivetrain damage is the most common outcome of a crash, but it’s also the least likely to cause immediate safety failure. A broken derailleur hanger stops the bike from shifting. A bent fork can stop the bike from being controllable. Check the drivetrain thoroughly, but don’t let it distract you from the higher-risk checks earlier in this list.
Derailleur hanger — check this first.
The derailleur hanger is a small aluminum bracket that connects the rear derailleur to the frame dropout. It’s intentionally designed as a sacrificial component — it bends or breaks in a crash so the frame dropout doesn’t. In right-side falls, it almost always takes damage.
How to check: look at the rear derailleur from directly behind the bike. The derailleur cage should hang parallel to the wheel, pointing straight down. If it angles toward the wheel or outward away from it, the hanger is bent. A bent hanger causes chronic misshifting and, if severely bent, can throw the derailleur cage into the spinning spokes — destroying both the derailleur and the wheel.
Derailleur hangers are bike-specific, inexpensive, and easily replaced. If yours is bent, that’s the good kind of crash damage — but it still needs to be replaced before riding.
Chain
- Slowly run the chain through your fingers and feel for stiff or twisted links. A twisted link can snap under pedaling load. Also check for corrosion or links that have bent laterally.
Pedals and cranks
- Spin each pedal. A bent spindle produces an asymmetrical wobble as it rotates. Check that both pedals thread cleanly into the crank arm threads without wobble or play. A bent spindle can strip the aluminum threads in the crank arm over time.
Chainring
- Look at the teeth. Any that are bent, chipped, or missing will cause the chain to skip or drop under load.
Bottom bracket
- Slowly rotate the cranks. The motion should be smooth. Grinding or gritty resistance means the bottom bracket bearings have been damaged.
The Electrical System — Motor, Controller, Wiring, and Display
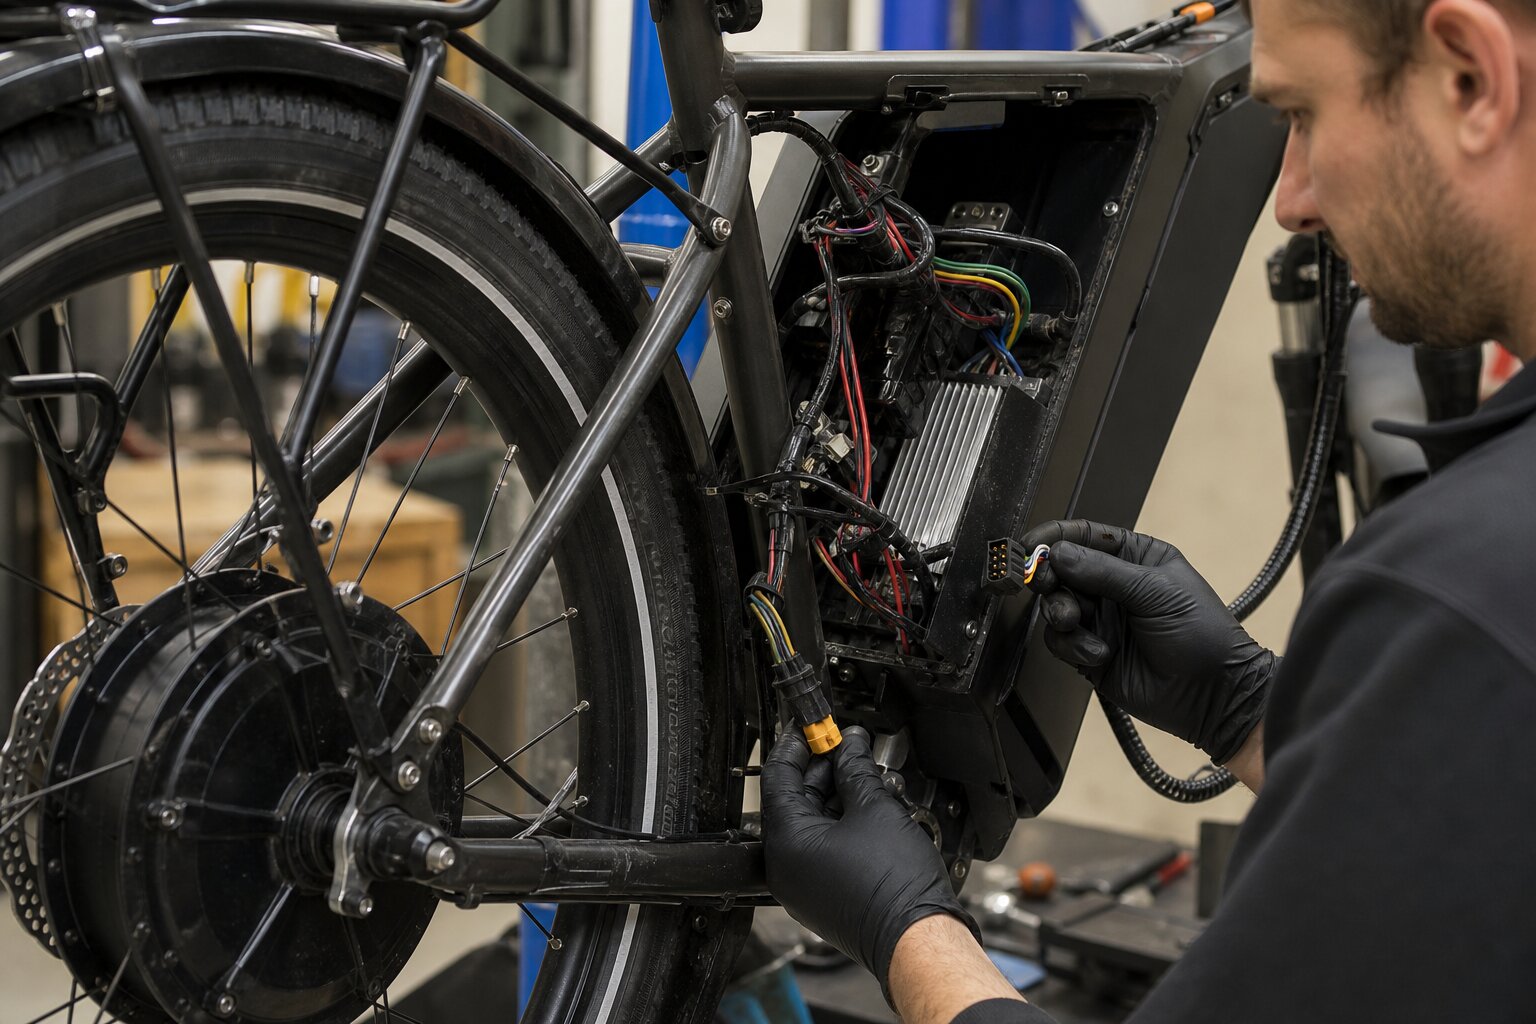
This is the inspection step that doesn’t appear on any general bike guide — and it’s where most of the invisible post-crash risk lives on an e-bike.
Power up and read the display first.
Before inspecting anything else electrically, reinstall the battery, power the bike on, and read the display. Error codes appear at startup and may clear within seconds as the system initializes. Photograph the display immediately if any codes appear — they’re diagnostic information a shop will need.
Wiring harness
Trace the wiring along its full route: from the motor or battery, along the frame and down tube, up to the display and handlebar controls. You’re looking for:
- Pinched cables where the frame or another component crushed the harness during impact, slicing through the insulation and creating a direct short circuit
- Cut or abraded insulation exposing bare copper wire
- Connectors that have been pulled apart or partially unseated — these break the digital communication between components, which is why e-bikes sometimes power on normally but don’t respond to throttle or PAS after a crash
- Bent or pushed-in connector pins inside the waterproof housings
If the controller casing has been cracked or dented, moisture can get in during cleaning or rain and cause galvanic corrosion across the internal circuit board — triggering error codes that appear days or weeks after the crash.
Hub motor
- With the battery removed, spin the wheel by hand. A healthy direct-drive hub motor has smooth, consistent magnetic resistance as it rotates. A healthy geared hub motor spins with minimal resistance.
- Grinding, heavy drag, or rhythmic knocking indicates damaged internal bearings or planetary gears. Check the motor housing for visible cracks.
Mid-drive motor
- Look at the motor housing around the bottom bracket for cracks or chipping from a direct impact.
- If the crash contacted the crank area, the torque sensor inside the motor housing may be misaligned or damaged — this causes erratic PAS behavior or no PAS engagement.
Lights, Sensors, and PAS — Does Everything Still Work?
After all static inspections pass, test every electronic function — lights, PAS, throttle, and sensors — before the ride test. Many crash-related electrical faults only appear when the system is actually running.
Work through this sequence in order:
- Front and rear lights — power the bike on and confirm both the headlight and taillight illuminate.
- Brake lights — squeeze each brake lever separately and confirm the rear light activates. A brake light that doesn’t respond when the lever is squeezed means the cut-off sensor is stuck, damaged, or disconnected.
- Pedal assist (PAS) — ride slowly and step through each assist level. Each level should engage smoothly and deliver proportionally more power. Erratic engagement, delayed response, or no response at a specific level indicates a fault. Erratic PAS after a crash often points to a bent speed sensor magnet or a damaged cadence sensor — both inexpensive fixes.
- Throttle (if equipped) — test at very low speed in a safe area. Throttle response should be smooth and proportional from 0 to full power. Jerky, delayed, or non-linear response points to throttle unit damage, wiring damage, or a controller problem.
- Speed sensor — ride past walking speed and watch the display. If speed isn’t registering, the speed sensor magnet may be bent or displaced. The magnet sits at a spoke near the wheel hub and is easy to knock out of alignment in a crash. This is a quick, cheap fix — but if the speed sensor isn’t working, the display and PAS system may not function correctly.
Any persistent fault in these systems that doesn’t respond to a visual fix — realigning the magnet, reseating a connector — gets diagnosed at a shop.
The Ride Test — How to Know if the Bike Is Truly Safe
Once all static inspections pass, do a controlled ride test before going back on the road. Some faults only appear under dynamic load — a controller that behaves normally at rest can show error codes when the motor works hard.
Where: A flat, traffic-free area. An empty parking lot is ideal.
How to run the ride test:
- Start at very low speed. Ride slowly and deliberately for the first 30 seconds.
- Test each brake independently. Left lever first, then right. Each should stop the wheel with firm, progressive resistance. Note whether the feel changes between the start and end of your test — deteriorating hydraulic feel under repeated use means fluid or air issues.
- Make a controlled turn in each direction. The bike should track smoothly through the arc with no pulling or resistance. Any pull to one side points to a steering or frame alignment problem.
- Accelerate through each assist level. Listen for grinding, clicking, or buzzing from the motor. Watch for error codes that appear under load — certain controller faults, including overheating MOSFETs and weak phase connections, only trigger when the system is working hard.
- Bring the bike to 15–20 mph. Feel for vibration, instability, or high-speed wobble that wasn’t present before the crash. If anything feels off, reduce speed immediately and walk the bike back. Vibration or instability at speed can indicate wheel, frame, or headset issues that weren’t obvious at slow speed.
Stop the ride test immediately if you notice:
- Pulling to one side under braking or while riding
- Any grinding, clicking, or grinding from the motor or drivetrain that wasn’t there before
- Brake feel that is spongy, inconsistent, or degrading during the test
- Vibration or frame flex that increases with speed
- Any error code that appears under load
Any of these means the bike needs professional attention before it goes back into traffic.
When to Take It to a Shop Instead of DIYing
Most of the inspection above can be done by any rider with their eyes, hands, and the bike’s built-in diagnostics. But some findings exceed what a field inspection can safely resolve.
Take the bike to a professional shop for any of these situations:
- Any suspected battery damage — cracks, dents, swelling, burning smell, or unusual heat. Do not ride, do not charge. Store it outside, contact the manufacturer.
- Carbon fiber frame concerns — any dull sound on the coin-tap test, any snagging on a cloth test, any visible cracking, whitening, or geometric depression in the tubes. Carbon frame assessment requires specialist tools and training.
- Hydraulic brake fluid loss — spongy levers that don’t firm up, any oily residue near the caliper or brake line. Brake bleeding requires the correct fluid, proper bleed kit, and technique. Done incorrectly, it leaves air in the system.
- Motor or controller error codes that persist after a full restart — these indicate mechanical issues or internal damage that typically requires diagnostic software to fully evaluate.
- Steering misalignment that can’t be corrected by re-centering the bars — the fork, headset, or steerer tube may be damaged.
- Frame welds showing cracking or paint buckling — structural failure in progress.
- Any wheel or rim damage you’re uncertain about after a high-speed crash.
If a third party was at fault: Before any repair work starts, photograph all visible damage from multiple angles, photograph the scene and any vehicle involved, and get a written condition assessment from a shop — not just a repair quote, but a formal description of the damage. Insurance adjusters require documentation, not verbal accounts. This article does not provide legal advice. For injury claims, consult a personal injury attorney.
E-Bike Crash Inspection Checklist: A Quick-Reference Summary
A ten-point inspection run in order — before powering the bike back on — is the fastest way to establish whether the bike is safe to ride, needs targeted repair, or requires professional service. Each step covers one safety-critical system and takes under two minutes.
- Power off immediately and remove or disconnect the battery.
- Inspect battery housing for cracks, dents, swelling, burning smell, or unusual heat.
- Inspect frame tubes for bends, ripples, and paint cracking at welds; coin-tap carbon frames for delamination.
- Check fork alignment — wheel centered in fork legs, headset moves smoothly without clunking.
- Test both brakes — firm lever feel, no hydraulic fluid leaks, no rotor wobble or brake rub.
- Spin each wheel and inspect for lateral wobble and rim dents; check tire sidewalls for cuts or bulges.
- Inspect derailleur hanger angle, chain link condition, pedal spindles, and chainring teeth.
- Power on and read error codes; trace the full wiring harness for pinches, cuts, and loose connectors.
- Test headlights, brake lights, each PAS level, throttle response, and speed sensor display.
- Perform a controlled ride test in a traffic-free area — test brakes, turns, all assist levels, and high-speed stability — before returning to the road.
Electric Bike Motor Repair After a Crash — What’s Actually Fixable
Hub motor and mid-drive motor crash damage ranges from cost-effective bearing and sensor repairs to full motor replacement, depending on which internal component absorbed the impact. Identifying the specific failure — bearing, Hall sensor, phase wire, or axle — before authorizing service prevents replacing entire assemblies that need only a single part.
Hub Motor Damage
Hub motors are exposed at the wheel — especially in falls where the wheel strikes the ground directly. Common crash damage:
- Phase wire damage — the heavy-gauge wires carrying current from the controller exit through the hollow steel axle. If the axle edge cuts through the wire insulation during a crash, a direct short circuit occurs, potentially burning the controller’s MOSFETs. A skilled technician can splice these wires, apply heat-shrink tubing, and reinforce the exit point. This is a cost-effective repair.
- Bearing damage — extreme lateral impact can crush the internal steel cartridge bearings. Symptoms: grinding or heavy drag when the wheel is spun by hand. Extracting the damaged bearings with a puller and pressing in fresh replacements is a standard, affordable repair at most e-bike shops.
- Hall sensor damage — the hall sensors are tiny magnetic sensors embedded in the stator that track rotor position. If the crash severs these sensor wires, the motor stutters badly or won’t engage. A technician can desolder failed sensors and install replacements.
- Bent or snapped axle, severed stator windings — if the solid steel axle is snapped or the copper windings inside the motor are shorted through, the repair cost typically exceeds the motor’s replacement value. Total motor replacement is the right call.
Mid-Drive Motor Damage
Mid-drive motors are better protected by their central position, but direct crank impacts can cause:
- Cracked motor housing — visible around the bottom bracket area. A structurally cracked housing means motor replacement.
- Damaged torque sensor — erratic PAS behavior after a crank impact points to torque sensor misalignment or damage.
- Stripped motor mount bolts — the motor can shift under load if mounting hardware is loose. Check and retorque.
Warranty and Recall Considerations
Crash damage is rarely covered under manufacturer warranty. However, if a manufacturing defect contributed to the crash — a known issue flagged by a CPSC recall, for example — that’s a different situation. Check the CPSC recall database for your brand and model.
Ebike Battery Inspection After a Crash — The Risks You Can’t See
Crash-damaged lithium-ion batteries can deliver normal voltage and show no external damage while deteriorating internally. Visual inspection alone cannot detect all failure modes. What follows covers safe storage protocol, BMS diagnostic codes, and replacement cost reference for batteries that may be compromised after a crash.
According to OSHA’s lithium-ion battery safety guidance, mechanical damage is a recognized initiator of thermal runaway, and batteries subjected to mechanical damage should not be used or charged until assessed (OSHA Safety Guidance). The CPSC has issued multiple e-bike battery fire warnings — check the CPSC recall database for your brand and model before riding a crash-damaged battery.
Safe Storage Protocol for a Crash-Suspect Battery
The basic protocol — store outside on concrete, no charging, contact the manufacturer — is covered in the inspection section above. Two details that trip riders up:
Location: Outside means genuinely outside. A garage attached to a living space is not a safe interim storage location for a suspected battery. Concrete driveway, away from the structure, away from any exits.
Timeframe: Do not leave the battery unattended for the first few hours if any warning signs were present. Thermal events typically escalate rather than resolve on their own, and a battery that seems stable can change status rapidly. If in doubt, contact the manufacturer before the end of the business day — not after a weekend.
BMS Error Codes After a Crash
The BMS (Battery Management System) is the electronics inside the battery that monitors cell voltage, temperature, and current. After a crash, power the bike on and read any codes immediately — they can clear as the system initializes. Common post-crash battery fault codes:
- Cell voltage imbalance — one group of cells is reading significantly lower than others, indicating possible internal cell damage
- Over-temperature fault — the BMS is registering high internal temperature at rest
- BMS communication error — the controller and battery have lost their digital communication link
For Bosch systems, the eBike Flow app is the current official app for the smart system. For Shimano EP8, use E-TUBE PROJECT Professional for troubleshooting and error history, or E-TUBE PROJECT Cyclist for rider setup and firmware updates. For Bafang and generic BMS systems, error codes are in the manufacturer’s display documentation.
Replacement Pack Cost Reference
Major brand replacement packs (Bosch, Shimano, Bafang) typically run $300–$900 depending on capacity. Generic replacement packs are available at lower cost, but their BMS quality varies significantly. For a bike you’re going to keep and ride, a manufacturer-replacement pack is the safer investment.
Bent Bike Frame and Fork Damage — Repair or Replace?
Frame repair decisions are determined by material: aluminum becomes brittle at the deformation point and typically cannot be safely cold-set; steel can often be professionally realigned; carbon damage is counterintuitively repairable in some cases by composite specialists. Severity and damage location determine the cost path for each material.
Aluminum Frames
Aluminum cannot be safely bent back into shape after a crash deformation. When aluminum deforms under impact, the crystalline structure of the metal is permanently altered at that point. Attempting to cold-set it back to original geometry introduces metal fatigue — the alloy becomes brittle at that location and is susceptible to sudden failure under normal riding loads.
The professional shop assessment for a bent aluminum e-bike frame is almost always: replace the frame or replace the bike. This is not upselling. It’s the correct materials-science answer. Some manufacturers sell replacement framesets that allow the drivetrain and components to be transferred; for a high-value e-bike, that may be more economical than a full replacement.
Steel Frames
Steel is more forgiving than aluminum. A frame builder with the right alignment tools can cold-set a steel frame and restore geometry in many cases, particularly for minor deformation. Steel doesn’t become brittle the same way aluminum does when deformed. Whether repair is worthwhile depends on severity and bike value.
Carbon Fiber Frames
Carbon is the most counterintuitive material. A carbon frame with visible cracking or a dull tap test result should not be ridden — but carbon damage doesn’t automatically mean the frame is scrap.
Specialized carbon repair facilities use ultrasound non-destructive testing to map internal damage precisely. If the damage is localized, technicians can grind away the compromised section, apply fresh layers of aerospace-grade carbon prepreg, and cure under vacuum in an autoclave. A properly executed carbon repair can restore stiffness, tensile strength, and impact resistance to original factory specifications.
This requires a certified composite repair specialist, not a general bike mechanic. And any carbon frame where the extent of damage is unclear — coin-tap test inconclusive, area of concern is near a joint — should be treated as unrideable until a specialist has evaluated it.
Cost Framework by Material and Scenario
- Budget aluminum commuter with bent frame: The repair assessment cost may approach the bike’s value. Calculate replacement cost of bike vs. frameset vs. repair assessment before committing.
- Premium aluminum or cargo e-bike: Check whether the manufacturer sells replacement framesets. Component transfer often makes more sense than buying a new complete bike.
- Carbon frame with localized damage: Get a composite specialist assessment before deciding. A good repair is less expensive than a new premium frame.
- Any frame with uncertain damage extent: Shop assessment before riding — without exception.
Ebike Throttle and Controller Damage — Diagnosing After Impact
When an e-bike powers on normally but the motor does not respond to throttle input, the fault is typically isolated to one of three circuit points: the brake cut-off sensor, the throttle unit itself, or the motor controller. A multimeter and a systematic approach narrows the diagnosis without dismantling the bike.
Failure Mode 1: Stuck Brake Cut-Off Sensor
The most common — and most overlooked — cause. Squeeze and fully release each brake lever. If a lever feels sticky or doesn’t return cleanly, the pivot is jammed and the controller will ignore all throttle input. See the Brakes section for the full diagnostic. If the levers return cleanly but the throttle still doesn’t respond, check whether PAS works — if pedal assist engages but throttle doesn’t, the problem is isolated to the throttle circuit.
Failure Mode 2: Damaged Throttle Unit
A direct handlebar impact can crack the throttle housing or destroy the internal hall-effect sensor — the tiny magnet inside the throttle that generates a variable voltage signal as the grip rotates. That signal tells the controller exactly how much power to deliver.
To diagnose with a multimeter: the throttle signal wire (often green, blue, or white depending on manufacturer) should read approximately 0.8–1V at rest and climb linearly to 4–4.3V at full rotation. A reading of 0V, a flat-line that doesn’t change with rotation, or a wildly fluctuating signal confirms the throttle unit is damaged. Throttle replacement is a low-cost repair — most units run $15–$60 plus labor.
Failure Mode 3: Controller Damage
The controller provides a 5V reference voltage that powers the throttle’s internal sensor. Without it, the throttle can’t generate a signal. If the controller took a direct impact or its waterproof seal was breached, this reference voltage may be absent or erratic.
To check: with the bike powered on, back-probe the throttle connector with a multimeter in DC voltage mode. A healthy controller outputs 4.3–5V on the power supply wire. If absent or erratic, the controller needs replacement.
For reference, a fully charged 36V system should read 32–38V at the controller input; a 48V system 42–54V; a 60V system 50–66V. If battery input voltage is in range but the 5V reference is missing, the controller’s internal step-down circuitry has failed.
What to Do if Your E-Bike Was Damaged in an Accident Involving a Car
When a motor vehicle is involved in a crash, scene documentation and a formal written shop assessment matter as much as the mechanical inspection. Insurance adjusters work from records, not verbal accounts, and a claim without proper documentation is significantly harder to settle at full value.
At the Scene
- Photograph the bike from multiple angles — all visible damage, its position relative to the vehicle, and the full scene including road layout, traffic signals, and lane markings.
- Photograph the vehicle involved, including license plates and visible damage.
- Record the exact date, time, and location.
- Collect the driver’s name, license number, and insurance information.
- Get contact information from any witnesses.
- Call law enforcement and request a police report. The report number is a critical piece of documentation for any insurance claim.
Before Any Repair Work
- Get a written condition assessment from a bike shop — a formal written description of the damage, not just a verbal estimate. Insurance adjusters require documentation. A claim without it is significantly weaker.
- Photograph all damage in detail before anything is removed or adjusted.
- Do not authorize repairs until you understand your insurance situation.
Insurance Coverage
- If the driver is at fault, their auto liability insurance should cover property damage to the e-bike up to their policy limit. If they carry only state-minimum coverage, significant damage may result in an underpaid claim.
- Your homeowner’s or renter’s insurance may cover the bike under personal property provisions — check whether motorized vehicles are excluded and what the coverage limit is.
- Dedicated e-bike insurance policies from specialty carriers generally provide better crash and property damage coverage than standard homeowner’s policies.
- Uninsured/underinsured motorist coverage from a personal auto policy can apply if the at-fault driver was uninsured or fled the scene.
This section does not provide legal advice. For any injury claim, consult a personal injury attorney — most offer free consultations and take e-bike cases on contingency.
Frequently Asked Questions
Frequently Asked Questions
How do I inspect my e-bike after a crash?
Power the bike completely off and remove or disconnect the battery before doing anything else. Then work through these checks in order: (1) Battery housing — look for cracks, dents, chemical smell, or unusual heat; if any are present, do not charge or store indoors. (2) Frame — sight down the tubes for bends, check welds and paint for cracking. (3) Fork — confirm the wheel tracks centered and the headset moves smoothly. (4) Brakes — squeeze both levers and confirm firm feel and full engagement. (5) Wheels — spin each wheel for lateral wobble; check tires for sidewall cuts or bulges. (6) Drivetrain — check derailleur hanger, chain, and pedals. (7) Electrical — power on, look for error codes, test all functions. If everything passes, do a slow ride test in a traffic-free area before returning to the road.
Is it safe to ride my e-bike right after a crash?
No — not until you have completed a full inspection. The most critical risk is the battery: according to OSHA’s lithium-ion battery safety guidance, mechanical damage can initiate a battery fire cascade hours after impact with no external warning signs (OSHA Safety Guidance). Beyond the battery, structural damage to the frame or fork that is not immediately visible can cause sudden failure at speed. Even if the crash seemed minor, spend 15–20 minutes working through the inspection checklist before getting back on. If anything in the inspection raises a concern, ride conservatively to a shop rather than continuing your original route.
What parts of an e-bike are most likely to be damaged in a crash?
The most common crash damage, ranked by frequency: (1) Derailleur hanger — a sacrificial aluminum piece designed to bend before the frame does, very common in right-side falls. (2) Brake levers — bend or crack on impact. (3) Handlebar and stem — misalignment or damage from direct impact. (4) Tires — sidewall cuts from sharp surface contact. (5) Wheels — going out of true from impact. (6) Throttle — cracked housing or damaged internals on handlebar-first falls. (7) Battery housing — outer casing cracks from drops or side impacts. (8) Display — cracked screens. (9) Frame — usually only in high-speed crashes or those involving vehicles. Check in this order — the first items are most likely damaged, but the frame and battery are the most safety-critical to find.
What is the most important thing to check on an ebike after an accident?
The battery is the most safety-critical component to inspect after any e-bike crash. Start there — before the frame, brakes, or electrical system — because lithium-ion cells can sustain internal damage that causes fire hours after impact with no external warning signs. Once the battery is confirmed undamaged, complete the full e-bike crash safety checklist covering frame, brakes, wheels, and electrical system before returning to the road.
Can I do a post crash ebike inspection myself or do I need a bike shop?
Most of the post crash bike inspection can be done at home using your eyes, hands, and the bike’s own diagnostic display. The e-bike crash safety checklist for self-inspection covers battery housing, frame integrity, fork alignment, brake feel, wheel trueness, derailleur hanger, and electrical function — all assessable without special tools. The items that require a shop are: hydraulic brake fluid loss, suspected carbon frame damage, persistent motor or controller error codes after ebike troubleshooting, and any steering misalignment you cannot correct by re-centering the bars.
How do I know if my ebike battery is damaged after a crash?
Ebike battery inspection after crash begins with a visual check: look for any cracks, dents, or deformation of the battery housing, and check for any burning or chemical smell. Do not attempt to charge the battery if you notice any of these signs. Even with no visible damage, if the battery feels unusually warm, the bike shows battery-related error codes, or the range drops significantly after the crash, suspect internal cell damage. When in doubt, ebike battery replacement is the safer choice over riding on a potentially compromised pack.
What does a bent ebike frame look like after a crash?
Bent bike frame damage from a crash can range from obvious — a visibly bowed or kinked top tube or down tube — to nearly invisible. For aluminum ebike frames, look for rippled or buckled paint near the welds, which indicates the metal has deformed under impact. For steel frames, sight down each tube from the front and rear — any curve or offset is a red flag. For carbon ebike frames, use the coin-tap test: tap along the frame tubes and listen for a dull, hollow sound compared to the clear ring of undamaged carbon. Any bent bike frame concern that is not clearly cosmetic should be assessed by a shop before the bike is ridden again.
Why is my ebike throttle not working after a crash?
Throttle problems after a crash typically come from one of three sources: (1) the throttle housing cracked or the internal hall sensor was damaged by direct handlebar impact, (2) the wiring between the throttle and controller was pinched or severed in the crash, or (3) the controller itself was damaged. Start by visually inspecting the throttle housing, then trace the wiring from throttle to controller for any pinches or cuts. If the display shows a throttle-related error code, the issue is likely the throttle unit itself. If the bike runs on pedal assist but not throttle, the problem is isolated to the throttle circuit rather than the controller.
How do I check the ebike motor for damage after an accident?
Electric bike motor repair starts with a diagnostic inspection: turn the bike on and note any error codes on the display, as most modern systems will flag motor-side faults. For hub motors, spin the affected wheel by hand and listen for grinding or uneven resistance, which can indicate a bent axle or damaged internal bearings. Check the motor housing for visible cracks. For mid-drive motors, look for cracked or chipped housing near the bottom bracket area. If the motor engages but produces grinding, clicking, or reduced power output, take the bike in for electric bike motor repair or diagnostic service — motor internals are not a DIY repair for most riders.
Does ebike insurance cover crash damage and repair?
Ebike repair after an accident may be covered depending on your coverage situation. Standard homeowner’s or renter’s insurance policies sometimes cover ebike damage under personal property provisions, typically up to a coverage limit. Dedicated ebike insurance policies (offered by companies like Markel or Velosurance) generally provide better crash damage coverage. If a vehicle was at fault in the accident, the driver’s auto liability insurance should cover ebike repair costs and you should document all damage with photos and a written shop assessment before any repair work begins. Review your policy before assuming coverage.
What are the most common ebike problems after a crash?
The most common ebike problems after a crash, from most to least frequent: bent or broken derailleur hanger, bent brake levers, misaligned handlebars, damaged or cracked throttle, flat or cut tires, wheels gone out of true, display or sensor errors, cracked battery housing, and — in more severe crashes — bent fork, damaged ebike controller, or compromised frame. Running through the full ebike repair checklist after any crash will catch most of these. Ebike troubleshooting using the bike’s built-in diagnostic codes will flag the electrical issues that a visual inspection might miss.
How This Article Was Created
This guide was created using a mix of public safety guidance, manufacturer recommendations, and practical repair knowledge relevant to e-bike crashes. Sources reviewed included lithium-ion battery safety information, e-bike owner manuals, repair guidance from major component brands, and consumer safety resources related to post-impact battery, frame, brake, and electrical-system risks.
AI-assisted tools were used to help organize the article, improve readability, and structure the checklist format. However, the safety recommendations, inspection steps, and repair considerations were researched, reviewed, and refined by a human before publication.
The goal of this article is to give riders a clear, practical way to evaluate an e-bike after a crash, recognize warning signs that require professional service, and avoid riding when damage may create a fire, electrical, or structural safety risk.